Username: Chosen by the end user at the point of online registration
Password: Chosen by the end user at the point of online registration
As long as the end user has an active SLCORSnet user account with active permissions for real-time services, all real-time correction streams shall be available to the end user regardless of their location
Once the hardware and field software is configured to work on the Network RTK mode, the filed software may prompt for an NTRIP Caster address where you may input the above given SLCORSnet NTRIP Caster address.
Furthermore, the login credentials for the end user’s SLCORSnet account will also have to be entered in to the field software for authentication purposes.
In order to use the SLCORSnet corrections, the end user should have an internet connection which will be used to connect to the SLCORSnet NTRIP Caster gateway
Once a successful internet connection is established, and given the end user is properly authenticated with an active license to use the real time service, the end user shall successfully connect to the SLCORSnet NTRIP Caster
Once, connected to the NTRIP Caster, the end user shall receive the Mount point Source Table.
This source table lists all available mount points (different correction streams) in SLCORSnet
Once successfully connected to a mount point (a correction stream), the rover will start to transmit a NMEA string of its current position to the SLCORSnet control centre.
The system will take this positional information in to consideration and given that the rover is in a good location (no multipath or canopy) and after proper ambiguity fixing, the GNSS receiver should give a fixed solution.
Using the GNWEB Online RINEX Delivery Service
Steps to follow
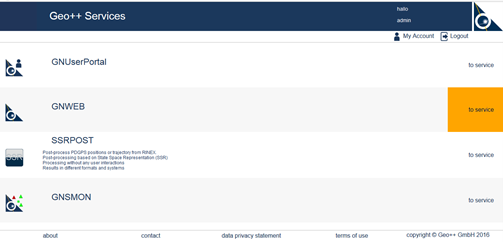
Once you have successfully created a user account in SLCORSnet user portal and have purchased the required licenses, you may log in to your user account. Once logged in, you will be presented with a gateway page to all SLCORSnet services as below;
If you have purchased the GNWEB service, the said service will be activated automatically for you and access will be granted. All further user authentications (if required) to any service within SLCORSnet will be with the same username and password credentials.
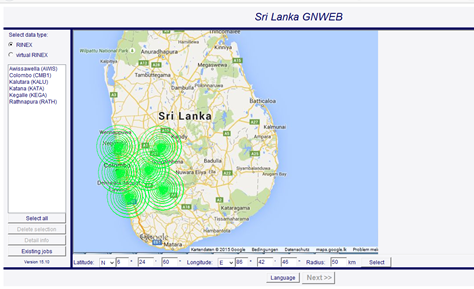
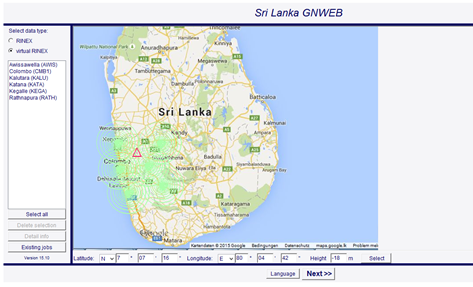
Once logged in to the GNWEB service, the below screen will be presented;
On the top left corner, you are able to select the file generation method from RINEX or Virtual RINEX.
If RINEX is selected, you are able to choose any physical reference station/stations from the list on the left or by clicking on a station in the map as shown below;
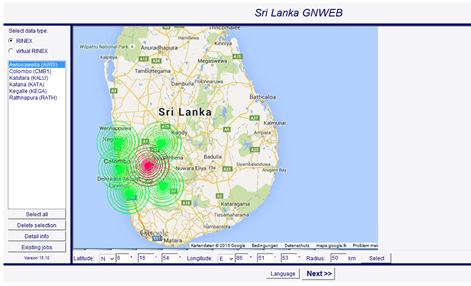
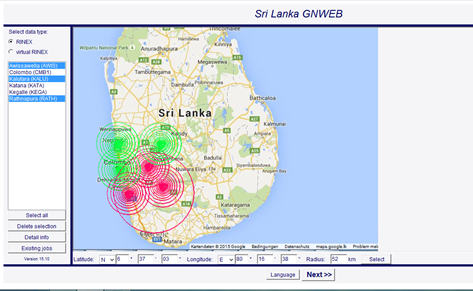
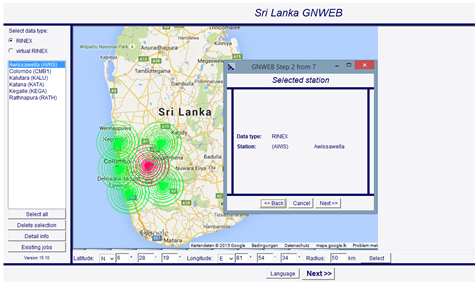
Alternatively you may click on ‘select’ button at the bottom and place the red circle (with a red dot in the middle) that appears on the map anywhere within the network. Also, you may type in the required coordinate in the space provided at the bottom and the circle will be automatically placed on the map. Once placed, it is possible to increase or decrease the size of this circle as shown below.
When you change the size of the circle, you change the physical reference stations (quantity) from which the RINEX file will be created. If the circle is larger, it will increase the number of physical reference stations from which the system will use raw data to generate the RINEX file. The radius of the circle can also be input in KMs at the bottom of this page.
Alternatively, you may also use the Virtual RINEX mode to create a RINEX file for any point with in the network. Virtual RINEX files are generated from the SSR database within the network. Once virtual RINEX mode is selected from the top left corner, you may click the ‘select’ button as before or type in the required coordinate in space provided at the bottom. Also enter the required ellipsoidal height of the virtual RINEX point at the bottom of this page next to the coordinates. A red triangle with a red dot in the middle will appear as shown below.
Once selected, click NEXT at the bottom and your choice will be prompted as below
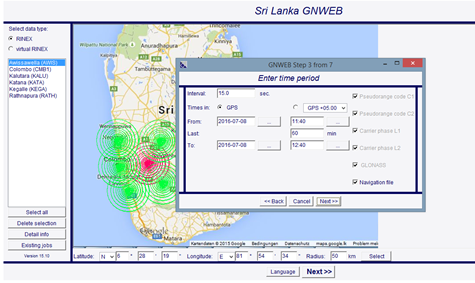
Then you will be prompted to select the date and time for the required RINEX generation and the raw data logging interval as below;
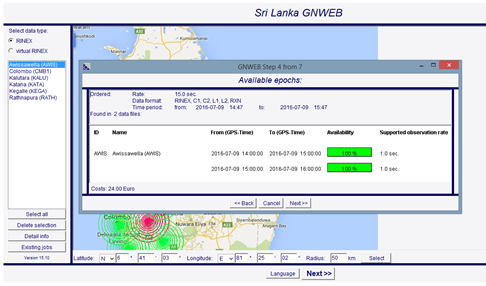
The GNWEB service will then indicate the availability of raw data for the requested coordinate point as shown below and you may choose according to your requirement. Then click ‘NEXT’;
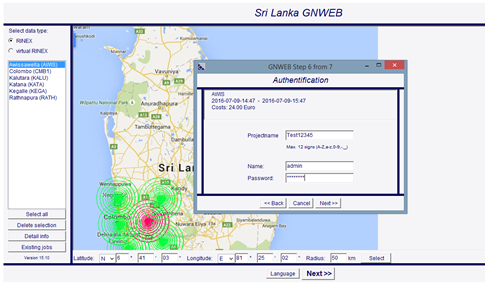
This window lets you choose the data format and compression method;
Put in your own project name for the set of data. This project name needs to be unique, the project name will become the name of the zip file containing the data, and the name of the data files is constructed of the name of the station and the GPS day number. Use the same user name and password as your main login. Then click ‘NEXT’;
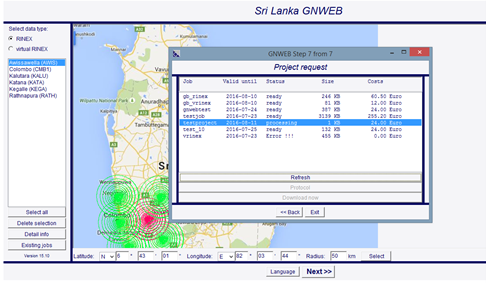
The window will show the status of the current project as shown below. Click ‘Refresh’ from time to time to see whether the project is completed. When the project is ready to download, the status will appear as ‘Ready’. Even if you close the screen at this instant, the project will run in the SLCORSnet servers and the project will be ready when you log back on later.
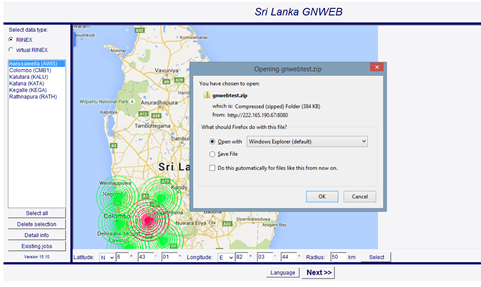
When the project is giving ’Ready’ status, you may click on ‘Download Now’. The files will be downloaded as .zip files to your computer as shown below. Please make sure to disable any download blockers within the browser and in your computer to allow a successful download process;
How to Use the SSRPOST Post Processing Service
Steps to follow
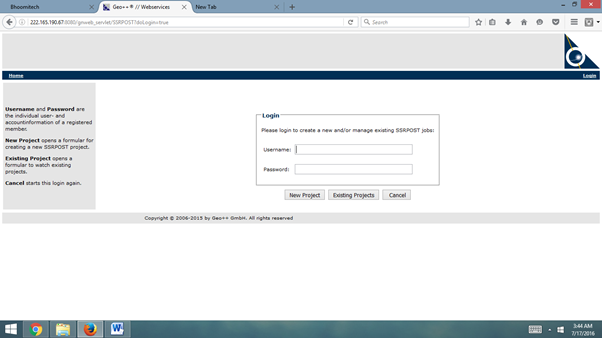
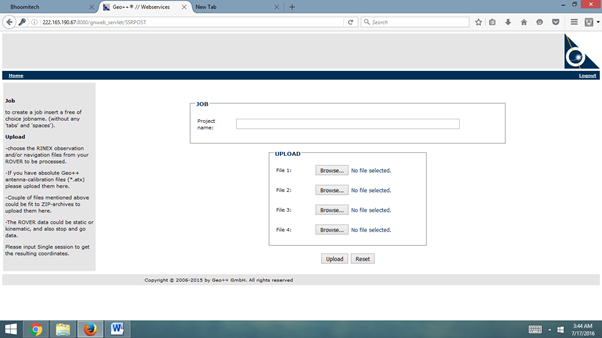
Once the SSRPOST Post processing service is purchased successfully, you may click on the activated SSRPOST service link and the below screen may appear. On this screen, please enter your user name and password and click ‘New project’ button if a new project needs to be created for post processing. Or you may click on ‘Existing Projects’ button to view/download existing projects.
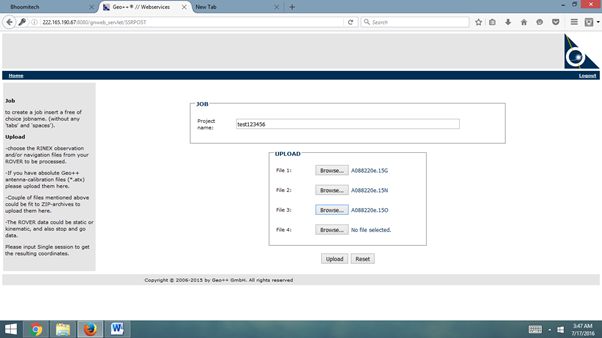
Once entered, the below screen will appear. Please enter a new project name without any spaces and you may upload the RINEX file that needs to be processed. Please make sure to enter raw files in RINEX 2 format.
Once the , G and O files of the raw RINEX file is entered, it will look like the screen as shown below
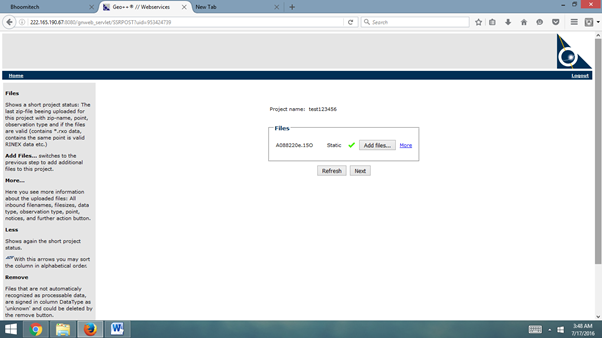
Once successfully uploaded, it will look like the screen below and prompt a successful project creation and upload process. Here you may click on ‘Add fies…’ button to add further raw files to the same project for post processing
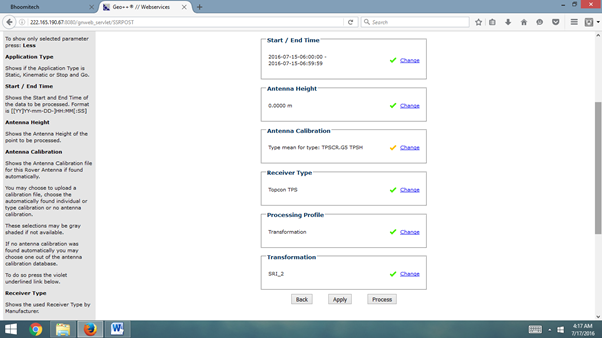
Once the SSRPOST system confirms the uploaded file/files, the system will prompt as shown below with quality of each aspect of the raw file. Then, you may proceed to process the uploaded raw file by clicking the ‘Process’ button
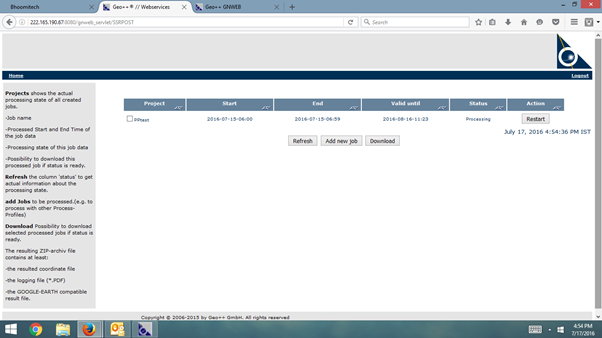
The below screen will appear showing the status of the project file. Once the project is completed, the status will appear as ‘Complete’. You may click on the download button to download any completed project. Also, you may ad files to post process and log out anytime. You may log back in to the service to check the status of the post processing activity and download files when completed.
Sri Lanka Continuously Operating Reference Station Network